Preparing Anchors
Ce contenu n’est pas encore disponible dans votre langue.
Install Arduino IDE
Section titled “Install Arduino IDE”- Download Arduino IDE 2.x
- Open Arduino IDE
- File > Preferences: add to “Additional Board Manager URLs”:
https://raw.githubusercontent.com/espressif/arduino-esp32/gh-pages/package_esp32_index.json
- Tools > Board > Board Manager: search “esp32”, install esp32 by Espressif
- Tools > Manage Libraries: install:
WiFiManagerby tzapuAdafruit SSD1306Adafruit GFX LibraryAdafruit BusIO
Flash an Anchor
Section titled “Flash an Anchor”- Open
firmware/topos_anchor/topos_anchor.inoin Arduino IDE - Edit line 23 for the anchor number:
#define UWB_INDEX 0 // 0 for A0, 1 for A1, 2 for A2
- Tools > Board: select
ESP32S3 Dev Module - Tools > Port: select the USB port (e.g.
/dev/cu.wchusbserial10) - Click Upload
- Wait for flash to complete (~30s)
Configure Anchor WiFi
Section titled “Configure Anchor WiFi”On first boot after flashing:
- The OLED display shows
WiFi: configuring... - On a phone, connect to the WiFi network
topos-A0(or A1, A2) - A captive portal opens automatically
- Enter:
- SSID: the venue’s WiFi network name
- Password: the WiFi password
- Topos server IP: the IP address of the Mac/PC running Topos (e.g.
192.168.1.42)
- Click Save
- The anchor reboots and connects to WiFi
Changing WiFi Network (new venue)
Section titled “Changing WiFi Network (new venue)”The anchor remembers one WiFi network. When you move to another venue, make it forget the old one — two ways:
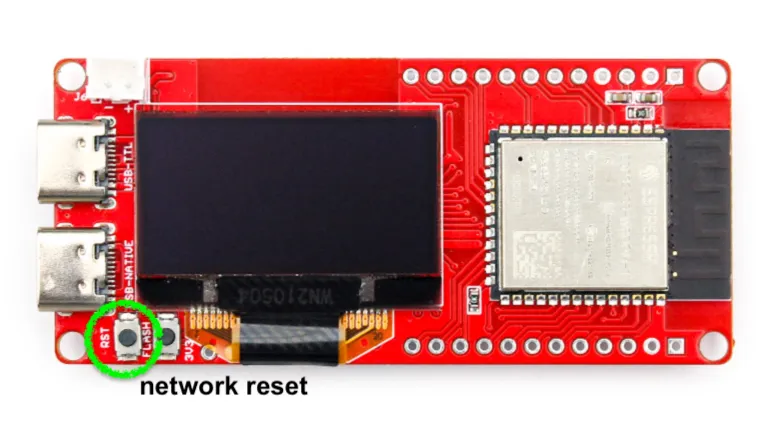
With the button, no computer. The board has two buttons next to the OLED, RST and FLASH. Press RST twice within 10 seconds. The OLED shows DOUBLE RESET, the anchor wipes its stored WiFi and config, and reopens the topos-AX portal as on first boot. Then redo the steps above. (A single press of RST is a normal reboot and changes nothing.)
From the anchor’s web page. While the anchor is still on the old network, read its IP on the OLED and open http://<anchor-ip>/ from any device on the same LAN. The page shows the anchor ID, SSID, IP and current Topos destination. Two actions:
- save — change the Topos server IP without rebooting (takes effect on the next packet).
- forget wifi & reboot — wipes the WiFi credentials and restarts into the portal.
Either way, the Topos server IP is asked again in the portal: it usually changes with the venue too.
 7. The OLED display shows the assigned IP and the Topos server IP
Changing venues: if the saved WiFi is not available, the anchor automatically reopens the configuration portal after 2 minutes.
Repeat for Each Anchor
Section titled “Repeat for Each Anchor”Flash 3 anchors with UWB_INDEX = 0, 1, 2. Configure WiFi for each.